

A dry, sunken chocolate fudge cake is almost always the result of two mistakes: overmixing after the flour goes in, and opening the oven door too early. The batter is thinner than most people expect, so it gets stirred to death in an attempt to make it “look right,” which builds gluten and destroys the crumb. Then, curiosity takes over at the 25-minute mark, the door swings open, and the center drops.
This is a cake that needs a light hand and a little trust. The method is closer to a quick bread than a traditional layer cake, and the hot water at the end is not a mistake. It looks wrong until it suddenly looks very right.
Three Things That Make or Break It
The recipe has only a few moving parts, but each one has a reason to exist.
First, the butter and sugar must actually get light and fluffy. Three minutes is not a suggestion. This step creates the air pockets that give the cake lift before the baking powder and baking soda even start working. If the butter is too cold, you will be beating for six minutes and still not get there. If it is too warm, the mixture turns greasy and collapses in the oven.
Second, the alternating addition of dry ingredients and milk is the classic insurance policy against a tough cake. Starting and ending with the dry ingredients keeps the batter from curdling, and the short intervals means you never have to mix hard to incorporate the next batch.
Third, the hot water thins the batter dramatically. That thinness is what allows the cocoa powder to hydrate fully and the crumb to stay fudgy rather than bready. Do not skip it, and do not replace it with cold milk because the temperature affects how the starches gel.
Ingredient Choices and Why They Matter
The all-purpose flour is the right choice here. Cake flour will make it too delicate to hold the moisture, and bread flour will turn it into a chocolate-scented sponge. Plain, mid-range all-purpose flour gives the structure needed for a dense but tender slice.
The cocoa powder matters more than anything else. Unsweetened, natural cocoa powder has a sharp, almost sour edge that balances the sugar. Dutch-processed cocoa is milder but also less acidic, which means the baking soda has less to react with. If you only have Dutch cocoa, the cake will still work but expect a slightly tighter crumb and a less pronounced rise.
The sugar amount looks high, but it is doing two jobs. It sweetens, obviously, but it also holds onto moisture. Reducing it by more than a quarter will change the texture from fudgy to dry, even if the baking time stays the same.
Whole milk is the default because the fat helps carry the chocolate flavor. A lower-fat milk makes the crumb feel drier on the tongue even if the cake itself is technically moist.
The Method, Step by Step
When you preheat the oven, set it to 175°C, which is 350°F. If your oven runs cool, get an oven thermometer. This cake needs the full heat to set the structure before the moisture steams off.
Creaming the butter and sugar is the first real checkpoint. The mixture should look pale, fluffy, and increased in volume. It should not look wet or separated. Scrape down the bowl at least once during this stage because the butter collects at the bottom and on the sides.
When the eggs go in, add them one at a time and beat just until each one disappears. The mix may look slightly curdled after the first egg. That normalizes as the next eggs and the dry ingredients join in.
The dry ingredients should be whisked together until the cocoa and baking powder are evenly distributed. You want no streaks of white flour or light brown cocoa. If you skip this step, the leavening will be uneven and the cake will bake with patches that rise too much and patches that do not rise at all.
During the alternating addition, mix each batch only until you no longer see a flour pocket. The batter will be thick and almost sticky at this point. That is correct.
The hot water goes in last. As you stir, the batter transforms into something resembling a thin chocolate sauce. It will splash a little if you mix too fast. Once the water is fully incorporated, stop. Mixing beyond this point breaks the fragile structure you built during creaming.
The pan should be greased generously. A 9-inch round cake pan is the right size. If you use a smaller pan, the cake will overflow or bake with a dense, wet center. A larger pan will give a flatter, drier cake.
The toothpick test is the best cue. At 35 minutes, insert a toothpick into the center. It should come out with a few moist crumbs clinging to it, not wet batter and not completely clean. A clean toothpick means the cake is overbaked.
Fix-It List: Problems and Solutions
Problem: The cake sank in the middle.
Cause: The oven door was opened too early, or the cake was underbaked.
Fix: Do not check before 30 minutes. If the center wobbles when the pan is gently shaken, give it another 5 minutes before testing.
Problem: The crumb is tough and chewy.
Cause: Overmixing after adding the flour.
Fix: Mix only until ingredients disappear. The hot water should be folded in gently, not beaten.
Problem: The cake is dry.
Cause: Overbaking or too much cocoa powder.
Fix: Check the cake at 33 minutes next time. Scoop the flour and cocoa with a light hand, not pressed down into the measuring cup.
Problem: The cake stuck to the pan.
Cause: Insufficient greasing.
Fix: Grease the pan thoroughly with butter or a neutral oil, and add a parchment round on the bottom for insurance.
Storing Chocolate Fudge Cake
The cake keeps at room temperature for two days if covered tightly with plastic wrap. After that, the edges start to dry out. In the fridge, it lasts up to five days, but bring it back to room temperature before serving because the butter firms up when cold.
For longer storage, wrap individual slices in plastic and freeze them for up to three months. Thaw at room temperature for about an hour. For general fridge and freezer guidance, see the FoodSafety.gov cold storage chart.
Can I Use a Different Pan Size?
Yes, with adjustments. An 8-inch pan needs about 10 extra minutes of baking and produces a taller cake. A 10-inch pan bakes faster, so start checking at 30 minutes. A square pan works in roughly the same time as a round one of the same size.
Why Is the Batter So Thin?
The hot water and the high liquid content are what create the fudgy texture. A thick batter would bake into a dense, dry brick. The thin batter allows the starch in the flour to absorb moisture fully while the water creates steam that lifts the cake.
Can This Be Made Ahead?
Yes, and it often tastes better the next day. The crumb settles and the chocolate flavor deepens overnight. Bake it the day before, cool it completely, and wrap it tightly. Leave it at room temperature if serving within a day, or refrigerate for longer storage.
What Frosting Works Best?
This cake is rich enough to hold a thick chocolate buttercream or a whipped ganache. A simple dusting of cocoa powder or confectioner’s sugar works if you want to skip the extra sugar. If you are looking for something even more layered, try a triple chocolate fudge cake for a version with extra chocolate flavor and a denser finish.
Serve slices with cold milk, a scoop of vanilla ice cream, or a spoonful of unsweetened whipped cream. The contrast between the deep chocolate and something cold and slightly sharp is what makes each bite work.
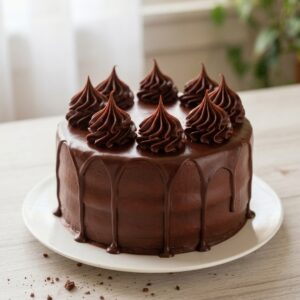
Chocolate Fudge Cake

Ingredients
- 200 g all-purpose flour
- 100 g unsweetened cocoa powder
- 400 g sugar
- 200 g butter softened
- 4 large eggs
- 240 ml whole milk
- 2 teaspoons baking powder
- 1 teaspoon baking soda
- 1 teaspoon vanilla extract
- 1/2 teaspoon salt
- 120 ml hot water
Instructions
- Preheat oven to 175°C (350°F) and grease a 9-inch round cake pan.
- In a large bowl, cream together butter and sugar until light and fluffy, about 3 minutes.
- Beat in eggs one at a time, then add vanilla extract.
- In another bowl, whisk together flour, cocoa powder, baking powder, baking soda, and salt.
- Alternate adding the dry mixture and milk to the butter mixture, starting and ending with dry ingredients, and mix until just combined.
- Stir in hot water until the batter is smooth and thin.
- Pour into prepared pan and bake for 35 to 40 minutes, until a toothpick inserted in the center comes out with a few moist crumbs.
- Cool in pan for 15 minutes, then turn out onto a wire rack to cool completely.
Notes
Use natural cocoa powder for the best rise and balanced flavor.
The batter will be thin after adding the hot water; this is normal.
For clean slices, wipe the knife between cuts.

