

No-Bake Cherry Yum Yum
Introduction
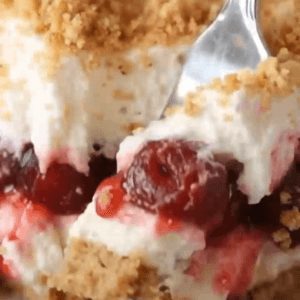
Have you ever bitten into a dessert that feels like a cross between cheesecake and a cloud? That is exactly what you get with this No-Bake Cherry Yum Yum. It is a layered, creamy, cherry-topped treat that comes together with minimal effort and maximum wow factor. The name might make you smile, but the flavor will keep you coming back for more. This recipe features a buttery graham cracker and pecan crust, a silky cream cheese filling, and generous spoonfuls of cherry pie filling. While the crust gets a quick bake to set it, the rest of the dessert is completely no-bake, making it a fantastic option for warm days or busy holiday schedules.
Ingredients for No-Bake Cherry Yum Yum
For the Graham Cracker Crust:
- 2 cups graham cracker crumbs (about 14 full-size crackers)
- 1/2 cup finely chopped pecans
- 1/4 cup granulated sugar
- 1/2 cup salted sweet cream butter, melted and cooled
For the Cream Cheese Filling:
- 1 (8-ounce) package cream cheese, softened
- 2 (8-ounce) containers whipped topping (Cool Whip), thawed
- 1 1/4 cups powdered sugar
- 1/2 teaspoon pure vanilla extract
- 2 (21-ounce) cans cherry pie filling
- 3 tablespoons finely chopped pecans (for garnish)
Use full-fat cream cheese for the best texture. If you prefer a less sweet crust, reduce the granulated sugar to 2 tablespoons. For a nut-free version, simply omit the pecans or replace them with extra graham cracker crumbs. Make sure the whipped topping is fully thawed in the refrigerator before folding it into the filling.
How to Make No-Bake Cherry Yum Yum
Prepare the crust. In a medium bowl, combine graham cracker crumbs, chopped pecans, and granulated sugar. Pour in the melted butter and stir until the mixture resembles wet sand. Press firmly into the bottom of a 9×13-inch baking dish. Bake at 350 degrees F for 8 to 10 minutes, until lightly golden. Let cool completely before adding the filling.
Whip the filling. In a large bowl, beat the softened cream cheese with an electric mixer until smooth. Add powdered sugar and vanilla extract, beating until creamy and lump-free. Gently fold in one container of whipped topping using a spatula. Do not overmix, or the filling may deflate.
Layer the dessert. Spread half of the cream cheese mixture evenly over the cooled crust. Spoon one can of cherry pie filling over the cream cheese layer, spreading gently to the edges. Top with the remaining cream cheese mixture, then the second can of cherry pie filling. Finish with the second container of whipped topping, spreading it into soft peaks or a smooth layer.
Chill. Sprinkle the remaining 3 tablespoons of chopped pecans over the top. Cover loosely with plastic wrap and refrigerate for at least 4 hours, preferably overnight. This allows the layers to set and the flavors to meld.
Serve and enjoy. Slice into squares with a sharp knife, wiping the blade between cuts for clean layers. Serve chilled.
For a firmer crust, press the mixture using the bottom of a measuring cup. If you are short on time, you can skip baking the crust, but it will be crumblier.
Nutritional Information for No-Bake Cherry Yum Yum
This recipe yields about 12 generous servings. Per serving, the approximate values are:
- Calories: 410
- Protein: 4 grams
- Carbohydrates: 52 grams
- Fat: 21 grams
- Fiber: 1 gram
These numbers are estimates and will vary based on specific brands and ingredient substitutions. The dessert is rich, so a small square goes a long way.
Preparation Time for No-Bake Cherry Yum Yum
- Prep time: 20 minutes
- Cook time: 10 minutes (for the crust)
- Total time: 4 hours 30 minutes (including chilling)
Compared to a traditional baked cheesecake, this No-Bake Cherry Yum Yum saves you at least an hour of active work and avoids the risk of cracking. The only heat involved is a quick toast for the crust, which you can even do a day ahead.
Healthier Alternatives for No-Bake Cherry Yum Yum
You can easily lighten up this no-bake cherry yum yum without losing its charm. Swap regular cream cheese for reduced-fat or Neufchatel cheese. Use sugar-free whipped topping and a no-sugar-added cherry pie filling. For the crust, choose gluten-free graham crackers if needed, and replace butter with a plant-based buttery stick. To make it dairy-free, use dairy-free cream cheese and coconut whipped topping. For a vegan version, ensure all ingredients are plant-based and use a vegan graham cracker. You can also reduce the powdered sugar to 3/4 cup if you prefer a less sweet filling. Adding a layer of fresh cherries on top of the pie filling boosts fiber and cuts some of the syrupy sweetness.
Serving Suggestions for No-Bake Cherry Yum Yum
This dessert shines on a holiday buffet or as a casual weeknight treat. Serve it in clear glass cups for individual portions, which show off the pretty layers. Add a dollop of extra whipped topping and a fresh cherry on each square. For a more elegant presentation, drizzle a little dark chocolate sauce over the top just before serving. Pair it with a cup of strong coffee, a glass of cold milk, or a sparkling cherry limeade. If you are serving adults, a small pour of bourbon or amaretto complements the cherry and pecan flavors beautifully.
Common Mistakes to Avoid with No-Bake Cherry Yum Yum
- Using cold cream cheese. Cold cream cheese will leave lumps in the filling. Let it sit at room temperature for 30 minutes before beating.
- Overmixing the whipped topping. Fold it in gently to keep the filling light and airy. Stirring too vigorously will deflate the mixture.
- Not cooling the crust completely. A warm crust will melt the cream cheese layer and create a soupy mess. Patience is key.
- Skipping the chill time. The dessert needs at least 4 hours to set. If you cut it too soon, the layers will slide apart.
- Using low-fat whipped topping that is still frozen. Thaw it in the refrigerator overnight, not on the counter, to maintain stability.
Storage Tips for No-Bake Cherry Yum Yum
Refrigerate any leftovers in an airtight container or cover the baking dish tightly with plastic wrap. The no-bake cherry yum yum will stay fresh for up to 3 days in the refrigerator. For longer storage, you can freeze individual squares. Place them on a parchment-lined baking sheet and freeze until solid, then wrap each square in plastic wrap and store in a freezer bag for up to 2 months. To serve, thaw in the refrigerator overnight. Do not microwave, as the whipped topping will melt and the crust will become soggy. The texture is best when served chilled straight from the fridge.
Why You'll Love This No-Bake Cherry Yum Yum
This No-Bake Cherry Yum Yum is proof that a stunning dessert does not require a hot oven or complicated techniques. With its crunchy pecan-studded crust, velvety cream cheese layer, and bright cherry topping, it hits every note you want in a crowd-pleasing treat. Whether you make it for a summer potluck, a holiday dinner, or just because you deserve something sweet, it is sure to disappear fast. I would love to hear how yours turns out. Leave a comment below and share your favorite variation or any questions you have. Happy no-baking!
Frequently Asked Questions About No-Bake Cherry Yum Yum
Can I make No-Bake Cherry Yum Yum ahead of time?
Yes, this dessert is perfect for making ahead. Prepare it up to 24 hours in advance and keep it covered in the refrigerator. The flavors actually improve as they sit, and the layers become easier to slice.
Do I have to bake the graham cracker crust?
The crust is baked briefly to help it hold together and develop a toasty flavor. If you want a truly no-bake version, you can press the crust into the dish and chill it for 30 minutes before adding the filling. It will be a bit crumblier but still delicious.
Can I use a different pie filling?
Absolutely. Blueberry, strawberry, or raspberry pie filling all work wonderfully in this recipe. You can also use homemade cherry pie filling if you prefer to control the sweetness and texture.
Is there a substitute for pecans?
Yes, you can omit the pecans entirely or replace them with chopped almonds, walnuts, or even toasted coconut. For a nut-free version, simply increase the graham cracker crumbs by 1/2 cup.
How do I get clean slices?
Use a sharp knife and wipe the blade with a damp paper towel between each cut. Chilling the dessert for the full time also helps the layers stay intact when slicing.
Can I use homemade whipped cream instead of Cool Whip?
You can, but the dessert will be softer and less stable. If using homemade whipped cream, whip 2 cups of heavy cream with 1/4 cup powdered sugar to stiff peaks, then fold it in as directed. Keep the dessert refrigerated until serving.
Is this dessert gluten-free?
The filling is naturally gluten-free, but graham crackers usually contain gluten. Use certified gluten-free graham crackers or gluten-free vanilla wafer crumbs to make the crust gluten-free.
How long can No-Bake Cherry Yum Yum sit out at room temperature?
Because it contains cream cheese and whipped topping, it should not sit out for more than 2 hours. Keep it chilled until just before serving, and return leftovers to the refrigerator promptly.
No-Bake Cherry Yum Yum

Ingredients
For the Graham Cracker Crust
- 2 cups graham cracker crumbs about 14 full-size crackers
- 1/2 cup finely chopped pecans
- 1/4 cup granulated sugar
- 1/2 cup salted sweet cream butter melted and cooled
For the Cream Cheese Filling
- 1 (8-ounce) package cream cheese softened
- 2 (8-ounce) containers whipped topping (Cool Whip) thawed
- 1 1/4 cups powdered sugar
- 1/2 teaspoon pure vanilla extract
- 2 (21-ounce) cans cherry pie filling
- 3 tablespoons finely chopped pecans for garnish
Instructions
- Prepare the crust. In a medium bowl, combine graham cracker crumbs, chopped pecans, and granulated sugar. Pour in the melted butter and stir until the mixture resembles wet sand. Press firmly into the bottom of a 9x13-inch baking dish. Bake at 350 degrees F for 8 to 10 minutes, until lightly golden. Let cool completely before adding the filling.
- Whip the filling. In a large bowl, beat the softened cream cheese with an electric mixer until smooth. Add powdered sugar and vanilla extract, beating until creamy and lump-free. Gently fold in one container of whipped topping using a spatula. Do not overmix, or the filling may deflate.
- Layer the dessert. Spread half of the cream cheese mixture evenly over the cooled crust. Spoon one can of cherry pie filling over the cream cheese layer, spreading gently to the edges. Top with the remaining cream cheese mixture, then the second can of cherry pie filling. Finish with the second container of whipped topping, spreading it into soft peaks or a smooth layer.
- Chill. Sprinkle the remaining 3 tablespoons of chopped pecans over the top. Cover loosely with plastic wrap and refrigerate for at least 4 hours, preferably overnight. This allows the layers to set and the flavors to meld.
- Serve and enjoy. Slice into squares with a sharp knife, wiping the blade between cuts for clean layers. Serve chilled.

