

No Churn Biscoff Ice Cream
Introduction
What if you could make creamy, dreamy ice cream without an ice cream maker? This No Churn Biscoff Ice Cream is the answer to your dessert dreams. With just a handful of ingredients and minimal effort, you can create a rich, velvety treat that rivals any store-bought version.
The magic lies in the combination of Biscoff cookie butter and crushed cookies, delivering that irresistible caramelized spice flavor in every bite. Whether you're a seasoned home cook or a beginner, this recipe is foolproof and guaranteed to impress.
Ingredients
Here’s what you’ll need to make this decadent No Churn Biscoff Ice Cream:
- 2 cups heavy whipping cream (cold)
- 1 can (14 oz) sweetened condensed milk
- 1 tsp vanilla extract
- 1 cup Biscoff cookie butter
- 10-12 Biscoff cookies, crushed
- Extra cookie butter for drizzle
Ingredient Tips & Substitutions
- Heavy cream must be cold for proper whipping. Chill your bowl and beaters beforehand for best results.
- Sweetened condensed milk adds sweetness and creaminess without granulated sugar.
- If Biscoff cookie butter isn’t available, substitute with any smooth nut butter or caramel sauce for a different twist.
- For a gluten-free version, use gluten-free Biscoff-style cookies.
Step-by-Step Instructions
Follow these simple steps to make your No Churn Biscoff Ice Cream:
- In a large bowl, whip the cold heavy cream until stiff peaks form. This ensures a light, airy texture.
- In another bowl, mix the sweetened condensed milk with Biscoff cookie butter until smooth.
- Add vanilla extract for a subtle depth of flavor.
- Gently fold the whipped cream into the Biscoff mixture to maintain volume.
- Stir in crushed Biscoff cookies for added crunch.
- Pour the mixture into a loaf pan or freezer-safe dish.
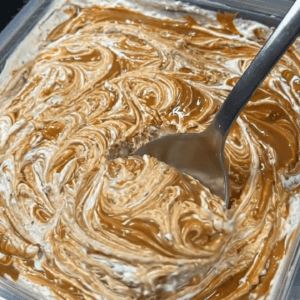
- Drizzle extra cookie butter on top and swirl with a spoon for a marbled effect.
- Sprinkle more crushed cookies over the top for extra texture.
- Freeze for 6-8 hours or overnight until firm.
- Let sit at room temperature for 5 minutes before scooping for a creamier consistency.
Nutritional Information
Serving size: ½ cup
Calories: 320
Protein: 4g
Carbohydrates: 28g
Fat: 22g
Fiber: 1g
This indulgent dessert is best enjoyed in moderation, but its rich flavor means a little goes a long way.
Preparation Time
- Prep time: 15 minutes
- Freeze time: 6-8 hours
- Total time: 6-8 hours (mostly hands-off)
Unlike traditional ice cream recipes that require churning, this no-churn method saves time and effort while delivering equally delicious results.
Healthier Alternatives
If you're looking for a lighter version, consider these swaps:
- Use coconut cream instead of heavy whipping cream for a dairy-free option.
- Opt for a sugar-free sweetened condensed milk alternative.
- Reduce the amount of cookie butter or use a lower-sugar spread.
While these changes alter the texture slightly, they still yield a satisfying frozen treat.
Serving Suggestions
This No Churn Biscoff Ice Cream is delicious on its own, but here are some creative ways to enjoy it:
- Serve in waffle cones with extra crushed Biscoff cookies.
- Layer with warm caramel sauce for an indulgent sundae.
- Pair with a cup of strong coffee or chai tea for a cozy dessert experience.
Common Mistakes to Avoid
To ensure perfect results every time, avoid these pitfalls:
- Overmixing the whipped cream, which can lead to a grainy texture.
- Skipping the freezing time, resulting in a soft, melty consistency.
- Not warming the cookie butter before drizzling, making it difficult to swirl.
Storage Tips
Store your No Churn Biscoff Ice Cream covered in the freezer for up to 2 weeks. For best texture, let it sit at room temperature for a few minutes before scooping.
If storing leftovers, press a piece of parchment paper directly onto the surface to prevent ice crystals from forming.
Conclusion
This No Churn Biscoff Ice Cream is a game-changer for dessert lovers. With its rich, spiced flavor and creamy texture, it’s sure to become a favorite. The best part? No special equipment is needed—just simple ingredients and a little patience while it freezes.
Try this recipe and share your experience in the comments below. We’d love to hear how yours turned out!
Frequently Asked Questions
Can I use regular peanut butter instead of Biscoff cookie butter?
Yes, but the flavor will differ. Biscoff has a unique caramelized spice taste that peanut butter doesn’t replicate.Why is my ice cream too hard after freezing?
Let it sit at room temperature for 5 minutes before scooping. Over-freezing can make it too firm.Can I add mix-ins like chocolate chips?
Absolutely! Fold in chocolate chips, nuts, or caramel bits for extra texture.How long does it take to whip the cream?
About 3-5 minutes with an electric mixer on medium-high speed.Can I make this recipe vegan?
Yes, use coconut cream and a dairy-free condensed milk alternative.What if I don’t have a loaf pan?
Any freezer-safe container will work, but a shallow dish helps with even freezing.Can I reduce the sugar in this recipe?
The sweetness comes from the condensed milk and cookie butter, so reducing either will alter the texture.How do I prevent ice crystals from forming?
Store with parchment paper pressed directly on the surface and keep it tightly covered.
Enjoy your homemade No Churn Biscoff Ice Cream—it’s easier than you think!
No Churn Biscoff Ice Cream

Ingredients
- 2 cups heavy whipping cream (cold) Heavy cream must be cold for proper whipping. Chill your bowl and beaters beforehand for best results.
- 1 can (14 oz) sweetened condensed milk Sweetened condensed milk adds sweetness and creaminess without granulated sugar.
- 1 tsp vanilla extract
- 1 cup Biscoff cookie butter If Biscoff cookie butter isn’t available, substitute with any smooth nut butter or caramel sauce for a different twist.
- 10-12 Biscoff cookies, crushed For a gluten-free version, use gluten-free Biscoff-style cookies.
- Extra cookie butter for drizzle
Instructions
- In a large bowl, whip the cold heavy cream until stiff peaks form. This ensures a light, airy texture.
- In another bowl, mix the sweetened condensed milk with Biscoff cookie butter until smooth.
- Add vanilla extract for a subtle depth of flavor.
- Gently fold the whipped cream into the Biscoff mixture to maintain volume.
- Stir in crushed Biscoff cookies for added crunch.
- Pour the mixture into a loaf pan or freezer-safe dish.
- Drizzle extra cookie butter on top and swirl with a spoon for a marbled effect.
- Sprinkle more crushed cookies over the top for extra texture.
- Freeze for 6-8 hours or overnight until firm.
- Let sit at room temperature for 5 minutes before scooping for a creamier consistency.

