

Nutella Tiramisu
Introduction
What if you could enjoy everything you love about classic tiramisu without soaking ladyfingers in espresso for hours or worrying about raw eggs? That is exactly what this Nutella Tiramisu delivers. It is a no-bake, no-fuss dessert that layers crunchy cocoa biscuits with a cloud-like mascarpone cream and everyone’s favorite chocolate hazelnut spread.
The result is rich, creamy, and slightly nutty, with just enough cocoa bitterness to balance the sweetness. Whether you need a last-minute dinner party dessert or simply want to treat yourself on a cozy weekend, this recipe comes together in about twenty minutes of active work. The fridge does the rest.
This is the kind of dessert that looks impressive but hides how simple it really is. You do not need special equipment beyond a hand mixer and a square dish. Once you make it, you will likely add it to your regular rotation.
Ingredients

Here is everything you need for a 20×20 cm pan, which serves about six people.
Base
- 70 g cocoa biscuits or cookies
- Nutella, about 1 teaspoon per biscuit, for spreading
- 50 ml warm milk or half milk, half coffee
Filling
- 250 ml heavy or whipping cream, cold
- 250 g mascarpone, cold
- 2 tbsp powdered sugar
Finish
- 1 tbsp cocoa powder for dusting
Ingredient tips and substitutions
- Cocoa biscuits: Italian-style cocoa biscuits or plain chocolate tea biscuits work well. Avoid overly sweet sandwich cookies, as the filling already brings plenty of sweetness.
- Nutella: You can use any chocolate hazelnut spread. For a more intense flavor, use a darker chocolate spread.
- Milk or coffee: Whole milk keeps the dessert sweeter and more kid-friendly. Using half milk and half strong brewed coffee creates a closer tiramisu feel.
- Mascarpone: Keep it cold until you use it. If mascarpone is not available, full-fat cream cheese can work in a pinch, but the texture will be slightly tangier.
- Powdered sugar: Adjust to taste. Two tablespoons is usually enough because Nutella and biscuits already add sweetness.
Step-by-Step Instructions
- Prepare the biscuit sandwiches
Spread about 1 teaspoon of Nutella on one cocoa biscuit. Top it with another biscuit and press gently to make a sandwich. Repeat with the remaining biscuits. You should end up with several neat little stacks depending on the size of your pan.
- Warm the dipping liquid
Warm the milk, or the milk and coffee mixture, until it is just lukewarm. It should not be hot, as hot liquid can make the biscuits fall apart too quickly.
- Dip the sandwiches
Dip each sandwich briefly into the warm mixture. A quick in-and-out dip is enough. Do not soak them. Arranged tightly, they will soften as the dessert chills.
- Layer the base
Place the dipped sandwiches in a single tight layer in the bottom of a 20×20 cm pan. Press them gently so there are no large gaps. If needed, break a sandwich to fill any open corners.
- Start the filling
Pour the cold heavy cream into a large mixing bowl. Whip it with a hand mixer on medium speed until it is halfway thickened. It should look slightly airy but still soft.
- Add mascarpone and sugar
Add the cold mascarpone and powdered sugar. Continue mixing on low speed at first, then increase to medium. Mix only until the cream is firm and holds its shape. Stop as soon as you see soft peaks. Overmixing can make the cream grainy.
- Spread the filling
Spoon the mascarpone cream over the biscuit layer. Use a spatula to spread it evenly all the way to the edges. Smooth the top with gentle swirls or keep it rustic.
- Chill
Cover the pan with plastic wrap or a lid. Refrigerate for at least 2 hours. The dessert tastes even better after 4 to 6 hours when the biscuits soften and the flavors melt together.
- Dust and serve
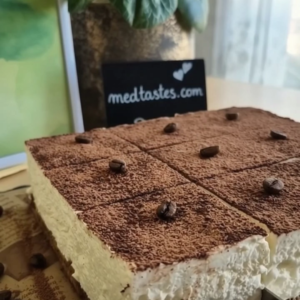
Just before serving, dust the top with cocoa powder using a fine sieve. Slice into squares and serve chilled.
Nutritional Information
This nutritional estimate is based on one serving when the recipe is divided into six equal portions.
- Calories: approximately 410 kcal
- Protein: 6 g
- Carbohydrates: 28 g
- Fat: 32 g
- Fiber: 2 g
- Serving size: 1 of 6 squares
Values will vary depending on the exact biscuits, Nutella portion, and mascarpone brand you use.
Preparation Time
- Prep time: 20 minutes
- Cook time: 0 minutes
- Chilling time: 2 hours
- Total time: 2 hours 20 minutes
Compared to traditional tiramisu, which often requires making zabaglione, whipping egg whites, and chilling overnight, this Nutella Tiramisu is significantly faster. It is also easier for beginner bakers because there are no raw eggs and no complicated layers.
Healthier Alternatives
This dessert is naturally indulgent, but you can make a few easy swaps if you want a lighter version.
- Use light mascarpone or a mix of mascarpone and thick Greek yogurt.
- Replace half of the heavy cream with chilled coconut cream for a slightly lighter filling.
- Choose whole-grain cocoa biscuits or sugar-free chocolate cookies.
- Use a sugar-free chocolate hazelnut spread instead of Nutella.
- For a gluten-free version, use your favorite gluten-free chocolate cookies or biscuits. The structure will stay the same as long as the cookies are crisp enough to hold the Nutella layer.
- For a dairy-free version, use dairy-free whipping cream, vegan cream cheese, and a plant-based chocolate spread. The taste will be different but still creamy and satisfying.
- To reduce sweetness, skip the powdered sugar or use only one tablespoon.
Serving Suggestions
This Nutella Tiramisu is best served chilled, straight from the fridge. Cut it into generous squares and place them on small plates. A light dusting of extra cocoa powder right before serving makes it look elegant.
Here are a few ways to make it feel even more special.
- Add chocolate shavings or chopped roasted hazelnuts on top for crunch.
- Serve with a spoonful of lightly whipped cream on the side.
- Garnish with a few fresh raspberries or strawberries. The tart fruit cuts through the richness beautifully.
- For a stronger tiramisu experience, serve small cups of espresso alongside each slice.
- Pair with a glass of cold milk for a nostalgic treat.
- For adults, a small glass of dark rum, amaretto, or hazelnut liqueur works wonderfully. You can also add a teaspoon of liqueur to the warm dipping milk for extra depth.
Common Mistakes to Avoid
Even a simple dessert can go wrong if a few key steps are overlooked. Here are the most common mistakes and how to prevent them.
Soaking the biscuits too long
This is the biggest mistake. A fast dip is all you need. If the sandwiches soak too long, the base becomes mushy and watery. A quick in-and-out motion keeps the right texture.
Using warm mascarpone
Cold mascarpone blends more smoothly and helps the cream hold its shape. If the mascarpone is too warm, the filling can become runny.
Overwhipping the cream
Once the mascarpone is added, stop mixing as soon as the cream forms firm peaks. If you keep going, the mixture can separate and turn grainy.
Spreading Nutella too thickly
A teaspoon per biscuit is enough. Too much Nutella can make the base overly sweet and the layers unstable.
Skipping the chilling time
The dessert needs at least two hours in the fridge. Without this time, the biscuits stay hard and the layers do not set. Rushing this step gives you a crumbly, messy result.
Dusting cocoa too early
Always dust the cocoa just before serving. If you dust it before chilling, the cocoa absorbs moisture and turns dark and patchy.
Storage Tips
Refrigeration
Store the Nutella Tiramisu covered in the refrigerator for up to 2 days. The texture is best within the first 6 hours, but it will still taste delicious the next day. Keep it tightly covered to prevent it from absorbing other fridge odors.
Freezing
You can freeze this dessert for up to 1 month. Place the fully chilled tiramisu in a freezer-safe container or wrap it tightly. To serve, move it to the refrigerator and let it thaw slowly for a few hours or overnight. The texture may be slightly denser after freezing, but it still tastes great. Dust with fresh cocoa powder after thawing.
Reheating
This dessert is not meant to be reheated. It should always be served cold or lightly chilled. If it has been frozen, thaw it in the fridge rather than at room temperature.
Conclusion
This Nutella Tiramisu proves that you do not need a long list of ingredients or hours in the kitchen to create a showstopping dessert. With crunchy cocoa biscuits, velvety mascarpone cream, and a generous hit of chocolate hazelnut spread, it hits all the right notes.
It is simple enough for a weeknight sweet treat and special enough for birthdays, holidays, or dinner parties. The recipe is flexible too. You can keep it kid-friendly with warm milk or add coffee and a splash of liqueur for a more traditional tiramisu character.
I hope you try this recipe and make it your own. If you do, leave a comment below and let me know how it turned out. Did you use coffee or keep it milky? Did you add any toppings? I would love to hear about your version.
Frequently Asked Questions
Can I make Nutella Tiramisu without coffee?
Yes. The recipe calls for warm milk or half milk and half coffee. For a caffeine-free and kid-friendly version, use only warm milk. The dessert will be sweeter and less like traditional tiramisu.
Can I make it ahead of time?
Yes, you can make it up to one day ahead. In fact, it often tastes better after several hours in the fridge. Add the cocoa dusting just before serving for the best appearance.
What can I use instead of cocoa biscuits?
You can use plain chocolate tea biscuits, chocolate graham crackers, or any crisp chocolate cookie that is not overly sweet. Avoid soft cookies because they will fall apart when dipped.
Can I use cream cheese instead of mascarpone?
Full-fat cream cheese can work in a pinch. The filling will be slightly tangier and a little denser. For the closest result, use mascarpone if possible.
How long does Nutella Tiramisu last in the fridge?
It will keep well for up to 2 days in a tightly covered container. The texture is creamiest within the first day but still enjoyable the next.
Can I freeze the leftovers?
Yes. Wrap the dessert tightly or place it in an airtight container and freeze for up to 1 month. Thaw it slowly in the refrigerator before serving.
Why did my filling turn runny?
This usually happens if the mascarpone or cream was too warm, or if the mixture was overwhipped and began to separate. Always use cold ingredients and stop mixing once firm peaks form.
Can I double the recipe?
Absolutely. Use a larger pan, such as a 20×30 cm dish, and double all the ingredients. The chilling time stays roughly the same.
Nutella Tiramisu

Ingredients
Base
- 70 g cocoa biscuits or cookies
- Nutella about 1 teaspoon per biscuit, for spreading
- 50 ml warm milk or half milk, half coffee
Filling
- 250 ml heavy or whipping cream, cold
- 250 g mascarpone, cold
- 2 tbsp powdered sugar
Finish
- 1 tbsp cocoa powder for dusting
Instructions
- Spread about 1 teaspoon of Nutella on one cocoa biscuit. Top it with another biscuit and press gently to make a sandwich. Repeat with the remaining biscuits. You should end up with several neat little stacks depending on the size of your pan.
- Warm the milk, or the milk and coffee mixture, until it is just lukewarm. It should not be hot, as hot liquid can make the biscuits fall apart too quickly.
- Dip each sandwich briefly into the warm mixture. A quick in-and-out dip is enough. Do not soak them. Arranged tightly, they will soften as the dessert chills.
- Place the dipped sandwiches in a single tight layer in the bottom of a 20×20 cm pan. Press them gently so there are no large gaps. If needed, break a sandwich to fill any open corners.
- Pour the cold heavy cream into a large mixing bowl. Whip it with a hand mixer on medium speed until it is halfway thickened. It should look slightly airy but still soft.
- Add the cold mascarpone and powdered sugar. Continue mixing on low speed at first, then increase to medium. Mix only until the cream is firm and holds its shape. Stop as soon as you see soft peaks. Overmixing can make the cream grainy.
- Spoon the mascarpone cream over the biscuit layer. Use a spatula to spread it evenly all the way to the edges. Smooth the top with gentle swirls or keep it rustic.
- Cover the pan with plastic wrap or a lid. Refrigerate for at least 2 hours. The dessert tastes even better after 4 to 6 hours when the biscuits soften and the flavors melt together.
- Just before serving, dust the top with cocoa powder using a fine sieve. Slice into squares and serve chilled.

