

The Ultimate Easy Chocolate Dessert
Introduction
What if you could make a decadent chocolate dessert that requires minimal effort but delivers maximum flavor? The Ultimate Easy Chocolate Dessert is the answer—perfect for anyone craving a rich, indulgent treat without hours in the kitchen. With just three simple ingredients and under an hour of total time, this dessert is bound to become a favorite for celebrations, potlucks, or even a cozy night in.
The magic of this recipe lies in its simplicity. A warm chocolate cake becomes irresistibly moist as sweetened condensed milk soaks into every bite, while a fluffy layer of whipped cream adds the perfect finishing touch. Keep reading to learn how to make this effortless showstopper.
Ingredients
To make The Ultimate Easy Chocolate Dessert, you’ll need the following ingredients:
- 1 (9×13 inch or 23×33 cm) baked chocolate cake (homemade or store-bought)
- 1 (14 oz or 400 ml) can sweetened condensed milk
- 2 cups (480 ml) whipped cream (freshly whipped or store-bought)
Ingredient Tips
- Cake Options: Use a boxed chocolate cake mix for convenience or bake one from scratch. A fudgy or moist chocolate cake works best.
- Sweetened Condensed Milk: Avoid using evaporated milk—it lacks the sweetness and thickness needed for this recipe.
- Whipped Cream: For a richer flavor, add 1 teaspoon of vanilla extract to the whipped cream before spreading.
Step-by-Step Instructions
Making The Ultimate Easy Chocolate Dessert is as simple as three steps:
- Bake the chocolate cake in a 9×13 inch pan and let it cool slightly. It should still be warm to the touch, as this helps the condensed milk absorb better.
- Use the handle of a wooden spoon to poke holes evenly across the cake’s surface. This step ensures the milk permeates every bite.
- Slowly pour the sweetened condensed milk over the cake, allowing it to seep into the holes. Pour evenly to avoid pooling in one area.
- Once absorbed, spread whipped cream across the top in an even layer.
Expert Tip
The key to a perfect texture is pouring the condensed milk while the cake is still warm. If the cake cools completely, the milk won’t soak in properly, leaving some parts dry.
Nutritional Information
Here’s a rough breakdown per serving (based on 12 servings):
- Calories: ~350
- Protein: 5g
- Carbohydrates: 50g
- Fat: 15g
- Fiber: 2g
This dessert is rich and meant for occasional indulgence. For a lighter version, check the healthier alternatives below.
Preparation Time
- Prep Time: 15 minutes
- Cook Time: 30 minutes
- Total Time: 45 minutes
Compared to layered cakes or elaborate desserts, The Ultimate Easy Chocolate Dessert comes together in less than an hour, making it ideal for last-minute gatherings.
Healthier Alternatives
For those looking for a lighter version, try these swaps:
- Use a sugar-free chocolate cake mix to reduce calories and carbohydrates.
- Substitute the sweetened condensed milk with a sugar-free or low-fat alternative.
- Opt for coconut whipped cream instead of regular whipped cream for a dairy-free option.
A gluten-free chocolate cake can also be used to accommodate dietary restrictions without sacrificing flavor.
Serving Suggestions
This dessert is versatile enough to pair with different toppings and accompaniments:
- Garnish with chocolate shavings, fresh berries, or crushed nuts for added texture.
- Serve with a scoop of vanilla ice cream for a warm-and-cool contrast.
- Pair with a cup of coffee or a glass of milk to balance the sweetness.
Common Mistakes to Avoid
Avoid these pitfalls to ensure dessert perfection:
- Poking too few holes: This prevents the condensed milk from distributing evenly.
- Using cold cake: The milk won’t absorb properly if the cake has cooled completely.
- Over-whipping the cream: This can make it dense instead of light and fluffy.
Storage Tips
- Refrigeration: Store covered in the fridge for up to 3 days.
- Freezing: The dessert can be frozen without the whipped cream layer for up to a month. Add the whipped cream fresh before serving.
- Reheating: If eating the cake warm, microwave individual slices for 10–15 seconds.
Conclusion
The Ultimate Easy Chocolate Dessert proves that simplicity doesn’t mean sacrificing indulgence. With minimal prep and maximum flavor, it’s a foolproof recipe for any occasion. Whether you’re hosting guests or treating yourself, this dessert is sure to impress.
Have you tried this recipe? Leave a comment below to share your experience or any creative twists you added!
Frequently Asked Questions
Can I use a different type of cake?
Yes! A vanilla or marble cake can work, but chocolate pairs best with the condensed milk.What if I don’t have sweetened condensed milk?
This ingredient is crucial for the signature texture, so substitutions won’t yield the same result.How far in advance can I make this dessert?
It’s best served within 24 hours, as the cake can become overly soft over time.Can I make this dessert gluten-free?
Absolutely—use a gluten-free chocolate cake mix for a celiac-friendly version.Why is my condensed milk not absorbing?
The cake may have cooled too much. Try slightly warming it before adding the milk.Can I add other toppings?
Yes! Chocolate syrup, caramel drizzle, or even cookie crumbles make great additions.Can I use Cool Whip instead of whipped cream?
Yes, though freshly whipped cream offers a better texture and flavor.Is the recipe suitable for vegans?
With dairy-free substitutes (vegan cake, coconut condensed milk, and coconut whipped cream), you can make a vegan version.
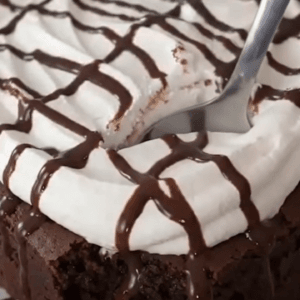
The Ultimate Easy Chocolate Dessert

Ingredients
- 1 (9x13 inch or 23x33 cm) baked chocolate cake (homemade or store-bought) Use a boxed chocolate cake mix for convenience or bake one from scratch. A fudgy or moist chocolate cake works best.
- 1 (14 oz or 400 ml) can sweetened condensed milk Avoid using evaporated milk—it lacks the sweetness and thickness needed for this recipe.
- 2 cups (480 ml) whipped cream (freshly whipped or store-bought) For a richer flavor, add 1 teaspoon of vanilla extract to the whipped cream before spreading.
Instructions
- Bake the chocolate cake in a 9x13 inch pan and let it cool slightly. It should still be warm to the touch, as this helps the condensed milk absorb better.
- Use the handle of a wooden spoon to poke holes evenly across the cake’s surface. This step ensures the milk permeates every bite.
- Slowly pour the sweetened condensed milk over the cake, allowing it to seep into the holes. Pour evenly to avoid pooling in one area.
- Once absorbed, spread whipped cream across the top in an even layer.

